Shop Project: The List

In March of 2016, I blogged about creating a shopping list of sorts with the intention of keeping Austin and Bantam parts out of scrap yards.  About a month later, I had begun to pursue the project, you can read about it here.

the shopping list

I honestly can’t believe that it was over a year ago that I last worked on this project.  Yet, somehow, I have lost track of time and have ended up neglecting something that could be very useful to the hobby.

As most of you already know, the AABC sells an excellent authenticity manual which is something you should consider adding to your collection.  The new edition is supposed to have some added features which my copy does not have, including the spiral binding and some factory drawings.

The purpose of this creation is not to allege authenticity or to step on the toes of the AABC’s manual, but to help create a spotter’s guide to ensure that the hobbyist who buys a basket case can identify what parts in the garage go with the Bantam or something along those lines.  I am hoping to not only include the bits that came with the cars from the factory but oddities which cropped up along the way and reproduction efforts of the past.

I will be posting updates on the blog informing you as to changes that occur.  Your comments, questions, and feedback are welcome and hoped for.  Some of the photos which I use may be sourced from the internet as I don’t have an example of every part to photograph, so please bear with me as I go.  If you would like to contribute, please feel free.

If there is a demand for it at the end, this may make a heck of a coffee table book, or maybe even an App for an Austin or Bantam enthusiast.

It’s time to reclaim eBay!

It’s no secret, I like eBay.  I could go on about how I have enjoyed it for years.  However, if you go on any Automotive blog, forum, or facebook group, you likely see it disparaged in a number of different ways.  Despite other people’s complaints and its allegedly negative effects on car shows, I have loyally defended eBay.

A few months ago, I penned a letter to the CEO of eBay, half knowing it would never be read.  It was an actual letter, ink on fine paper swaddled in a self-adhesive envelope donning a single antique truck themed stamp.  While I expected no reply, I extended a few thoughts on the current state of eBay Motors as it has been abused by certain sellers.

If you are reading this, you likely appreciate Bantams and are well aware that the parts for these cars are very difficult to find on eBay.  Typing in “American Bantam” as your search query will result in thousands of hits.  You may see something like this:

Screenshot (415)

You read that right, 4,943 parts!  The deluge of matches may make you think you can buy every part for your car.  However, this is unfortunately not the case.  Most of these items include a plethora of things including seat belt retainers that go between a bucket seat and a console, bilge pumps, cigarette lighter phone chargers, and OBD II scanners.  Each of these items alleges that it fits American Bantam cars.  This is the result of the eBay listing system allowing a seller to indicate the part fits every make, model, and year.  The result is confounding, actual Bantam parts are buried among this unrelated merchandise.

I have suggested a means where users can easily report unrelated items or the installation of eBay moderators who can make sure people are not abusing the interchange option provided by the website.  Today, I found something so you can also tell eBay that you are fed up with unrelated merchandise hiding the parts you need.

Screenshot (416)

In the circled area of the screenshot above, you can tell eBay what you think.  If you are unhappy with the way in which sellers of buffing pads are abusing the system, let eBay know.  If you are unhappy that the bilge pump will not properly fit your Bantam, let eBay know.

Once you click on the link above, it will take you to this screen:

Screenshot (417)

Let’s work together to make eBay a better marketplace for classic car enthusiasts.  In the mean time, check back here frequently and I will share the items I find with you.  I may not catch them all, but I will try.  Enjoy your Sunday!

It’s October, Are You Ready For Herhsey? Part II

I decided to break this post into a few segments to better sort the eBay offerings.  The previous post highlighted memorabilia, this one focuses on parts.  If parts and collectibles aren’t what you’re after, follow up for part three, the car corral.  That will be up a little later.

The same seller who has the employee badges also is offering a fairly well preserved American Austin badge which appears to have most of the retention clip in tact.

Click here to bid on the American Austin Grille Badge

Presumably from the same collection is a nice Bantam emblem.  It is hard to see if the enameling has any gouges or scratches from the photos, but it definitely seems to have some visible damage to the chrome.  However, most of the enameling on the back of the badge appears to have survived.  This one is already priced higher than the beautiful recreations by Bill Spear.

American Bantam Grille Badge 1

Click here to bid on the original American Bantam Grille Badge (I know I did :D)

However, if you want a badge which will not require restoration, you may want to consider one of these:

bantam-grille-badge-spear

Which can be purchased for $18 (while supplies last) at Wm. Spear Design.

Perhaps you need something of a more mechanical nature.  Then you may wish to consider these Bantam friction shock absorbers.  These are correct for all 1938-1939 Bantams and 1940 commercial Bantams.  You can differentiate the front set up from American Austin shock absorbers from the lack of the star washer on the front side.

American Bantam Shock Absorbers

Click here to bid on the American Bantam Shock Absorbers

Or, if you’re looking for something a little more rusty, a seller (actually me), has listed parts from a 1930 Austin which is being parted out.  Click on “other items” to see more.

American Austin Dash Board

Click here to bid on the American Austin Dash Board

Finally, if you are into toys, here is a very nice Austin hauler set up:

American Austin Car Hauler Toy

Click here to bid on the American Austin Car Hauler Toy


It’s October, are you ready for Hershey? Part I

I wish I could say yes, however I will not be in attendance this year.  It is probably one of only two or three shows I have missed in the past 21 years.  The last two years have been pretty good, Bantam parts-wise.  Since I will not be able to be there to hunt for the hard to find pieces on your list and mine, I will have to do my best from my desk.  If, like me, you aren’t or wont be at Hershey this year, here are a few Bantam bits on eBay which may interest you.

A seller on ebay, in western Pennsylvania, appears to have unearthed an interesting collection of Butler related memorabilia.  Among those items is an, impossible to find, employee badge from the American Bantam Car Co.  In the past five years on ebay, one other badge has made its way to auction.  The seller also has an employee badge from the Standard Steel Car Co. which preceded Bantam at its manufacturing facility and another two badges from the American Rolling Mill which finally took over Bantam around 1956.  If you look through the seller’s other items, you can see some other Butler related badges. These could be a nice addition to your collection.

American Bantam Car Co. Employee Badge

Click here to bid on the American Bantam Car Co. Employee Badge

Standard Steel Car Co. Employee Badge

Steel Car Co Badge 1

Click here to bid on the Standard Steel Car Co. Employee Badge

American Rolling Mills Employee Badge

American Rolling Mills badge 1

Click here to bid on the American Rolling Mills Employee Badge

ARMCO Employee Badge

ARMCO badge 1

Click here to bid on the ARMCO Employee Badge


Six of one, half dozen of another:

Yesterday, a seller listed a 1939 Bantam Roadster on ebay.  I don’t usually blog about vehicles listed on ebay which are not advertised on this site, but I am making an exception for this car.  Given the changing nature of the classic car market, I think this car presents a very unique opportunity to write about.

The subject of this post:

American Bantam Roadster NY 32

Click here to see the 1939 Bantam Roadster on ebay.

As of this morning, the car is up to $9,800 (the bidding has dropped to $3,716.66) and the reserve has not yet been met.  Overall, this is a nice car.  It looks like an older restoration, but we don’t know too much about what has been done to it.  We don’t know if the engine was rebuilt, how it was rebuilt, how it was maintained, what was done to the brakes, or really anything.  It’s a pretty car, in my opinion, but without getting an up close look at it, it may just be a very photogenic classic.

Having been in this situation recently, I can say, that buying an older restoration can be similar to buying a pig in a poke.  You don’t know really much about the car other than what you can see at the surface level.  You hope that you can change the fluids, put some gas in, and enjoy.  However, that is not a guarantee.

I have no idea what the reserve is, but I do know that restored Bantams don’t usually perform as well on ebay as they do at live auctions, Bantam specific publications, or in private sales at car shows.  Now, I’m sure you know that I like ebay, but it’s just not the best place to market one of these fantastic small cars.  So, let’s take the price out of consideration.

Now, for the purposes of exposition is a 1939 Bantam Roadster project car:

00y0y_kiwpMTvQM4Y_600x450

1939 Bantam Roadster – NY

Finding an original car awaiting a restoration is a fairly difficult these days.  A car such as the one above will definitely need metal work, paint, chrome, and all of the other usual accoutrements of restoration; however you would have complete control over every aspect of the process and you would be sure of the quality of the vehicle you are driving.  Your own hands could bring it to a level of excellence which it likely hasn’t seen since 1939.  Just imagine what you could do with a project car like this.

The complete project offers its own obvious set of challenges where as the older restoration is a little more covert about what it may offer its next owner.  I used to think I was only interested in a complete project of which I could control every aspect from the ground up.  However, sometimes we don’t have enough time to do that and it’s worth taking a chance on a good looking car which is closer to being a driver; just to get on the road.  Either way, you shouldn’t get your hopes up and you should make sure you are prepared to spend a little extra money in the case you need to tend to something like new brake cables or a wiring harness.

All things considered, which would you prefer; an older restoration to enjoy as is or a complete project which you can nurture into a Roy Evans award winner?  Then again, who am I kidding, these cars are small, so why should you need to choose.  Get one to enjoy and another to build!

Also, we’ll be taking a short break from the Shop Project for a week or so, but stop back soon to see our progress.

Mystery in plain sight- Round Bed Lamps

I don’t have a copy of the newly updated version of the American Austin Bantam Club’s Authenticity manual.  So, perhaps I’m writing this a bit prematurely, but I don’t believe this matter has been covered.  Should you have an updated version of the manual and this subject is covered, please let me know.

If you have been to the Everything Bantam facebook page, you have likely seen a photo of a man and his faithful pet Bantam pickup truck.  I’ve been staring past this photo for months and have only now come to realize a small detail which has thus far eluded me.  Take a look at the photos below and see if you can spot it.  Open the photos and look hard.

Did you spot it?  There on the drivers side rear corner, this car has what looks to be a Lux style taillight.  The same sort of assembly which was found on Bantam Coupes, Hollywoods, Rivieras, and Speedsters.  From past assumptions, I was under the belief that all Bantam commercial truck supposedly had the NACO style taillights.  Every one restored truck appears to have been given this treatment.  In fact, I believe my parts list also supports the usage of the NACO on round bed pickups.

Here are some photos of Bantam round bed pickup trucks sporting NACO taillights or similar variations.  They don’t look incredibly wrong, and these were definitely used on Panel trucks, Roadsters, and square bed pickups.  So, arguments can be made that these lamps are correct.   In fact, they look quite comfortable one each of these cars.

You may say to yourself, ‘Hey, that’s just a photo of one truck.  Maybe the guy could only get that assembly from a Bantam dealer?’  Your admonition may be right.  However, take a look at this factory photo:

Factory photoClick here to find a copy of the above factory photo for sale: 1940 Round Bed Pickup

That little round glass orb has made an appearance, indicating that the truck may in fact have a Lux style tail lamp.  The car also has an earlier style hood ornament which makes you wonder exactly when this car came to be.  Again you may hesitate to take this photo as meaning much because there are many factory photos that do not represent cars as they actually came from the factory.  Again, you would be justified.

So, going back through some photos I found a photo of the original bed from a pickup truck which had sat unmolested after one of the wrist pins scored one of the cylinder bores in about 1958.  Sure the truck had 7 coats of paint, but it was remarkably original.  Under all of the layers of paint you can see the original steel as it likely left the factory.  Here is a photo of the original bed in its glory:

1940 Bantam Pickup Truck Bed

The top and bottom mounting holes around the large central hole are identical to the ones used by Lux lamps in the above mentioned cars.

I was only able to dig up two photos of round back pickups with Lux style lamps, one is the convertible pickup (a dream car sort of thing) which was built by a club member in Florida and another is a 1940 pickup restored by a club member on the West Coast.

Now, I’m not saying that one lamp is right and another is wrong, but I like the look of the Lux lamp and it may be nice knowing you have some options in restoring your car.  This also may give you some wiggle room when restoring your car or some fodder for thought as you look over your next car.   This also reminds me that I need to order my new copy of the Authenticity Manual to see what it says on this topic.

1931 American Austin Roadster

DSCN6879

She’s a beautiful car isn’t she.  Absolutely gorgeous and tastefully restored too.  If you’re looking for a well preserved restoration, this may be just the car you are looking for.  The seller restored the car a few years ago, but has only put about 100 miles on the car since then.

For more information click here.  If you follow the link, you’ll learn more about the car for sale and you can view a plethora of photos of all of the fine details featured on this restoration.

Sportsman 4: Checking the Frame for Straightness

The chassis has found its new home in the shop, comfortably placed on a dolly and jack stands.  It doesn’t look too bad on the painted concrete floor, but it certainly shows signs of its age.  The first step in this project will be disassembling the chassis to strip it down to its most essential components.  As it sits, this chassis could be something you found in a chicken coop in Washington State, buried in mud in a Louisiana barn, or even under an original pickup truck in New York.

American Bantam Frame

Once the frame is stripped bare, you can begin to imagine all of the forms it may someday take on.  Will it the backbone of a stock restoration?  Will it hold together a special?  Perhaps it will be pushed to the limits keeping together a pepped up custom?  So long as it is still straight and strong, its possibilities are nearly unlimited.

Properly supporting American Bantam Frame

Whatever your dreams and plans may be, you need to make sure that you are not only starting with the correct foundation but, more importantly, a true one.  Bantam chassis consist of a forged front crossmember, two hat channel steel side rails, a central steel K member, and a rear crossmember of one of various configurations.  Like a model T, these frames were built to flex a bit.  They have little in common with the chassis of standard cars built during the same period.  These chassis are meant to have a bit of a spring to them which you can really sense if you put a foot on each frame rail near the center and put all of your weight on them.  It will undoubtedly bow in the center.  While this motion is normal, you should make sure that your rails are not buckled, twisted, or otherwise out of line.  You should also make sure that your frame doesn’t show any signs of rot or heavy pitting.  If the frame is damaged, you may want to consider finding another.  Frames are fairly plentiful and as this is the basis of the whole project, you are better off starting out with the best.

There are no published specifications indicating what a “straight” bantam frame should exhibit. The first endeavor was to mount the frame on four corners with the two at either end being level and the positions symmetrical from left to right.  Using some strong and straight wood provided for a flat mounting area so I wouldn’t have to worry about my frame slipping off of the jack stand grips to skew my measurements.

Remember, lifting this frame is not a hard feat, it’s probably 75 lbs at best.  However, be careful when lifting and shifting it.  You may need to adjust it a few times as you shim the jack stands or wood to level them out.  Once they are level, you can start inspecting and measuring your chassis.

Amazingly, three of the four mounting points were positioned well for leveling the frame. The front drivers side stand required a shim for which a small piece of junk mail filled the part quite well. Once I determined the wood itself was level, I placed the frame on it at similar points on each side. The frame made perfect contact at each point and the levels appeared to indicate relative trueness of the frame. I’m sure there are better ways to do this which would allow for more accurate results, but this seems to work.

Once it appeared there there was no twisting of the frame, I decided to see if the frame was pinched at all. Seeing the slight bends on the rear cross-member let me to believe there may be some issues in this regard. After realizing how hard it would be to do this with a standard tape measure and only one set of hands, I devised a better system.

First, I marked the frame with respect to fixed features found on each side using a heavy duty crayon. I marked off two measuring points on each side on the rear of the frame and one set of marks on the front. I then stretched out each of two very cheap harbor freight measuring tapes to hold them down to the frame using equally cheep harbor freight welding magnets. The magnets managed to hold the tape taut, but did pull a little bit when I exerted too much effort on the tape.

Both of the diagonally strung tapes measured up at the same distance which really began quieting my fears that this frame may be bent. Finally, I took my very precise Lowes ruler and suspended it across the frame where the tapes intersected. Sure enough, they intersected at the center of the span at that portion of the frame.

Not pictured was my determination that the frame was straight along its span.  Using a straight edge, I checked both hat channel side rails.  Both rails were flush with the straight edge until the point where the chassis sweeps upward.  Combining the straight edge test with the flush alignment of the chassis to the level wood helped me establish that the frame was in decent shape.

I’m sure I may have done better with factory measurements for the frame and a fancy frame jig, but I am very satisfied with the results. For all intents and purposes, this frame is straight.  After all of this, I am ready to begin transforming this bare chassis into the Bantam Sportsman project.

For this project you may need:

Tape measure

Two Thin Tape Measures, at least 10′ long

Click here to see the auction for the Tape Measure

Jack Stands

Four Jack Stands – these will come in handy for the entire project

Click here to see the auction for the Jack Stands

level straight edge

A straight edge / bubble level – Probably a good thing to always have for other projects.

Click here to see the auction for the Straight Edge / Level

Weekend Thoughts: What motivates you?

“If you waste your time a talking
To the people who don’t listen
To the things that you are saying
Who do you thinks gonna hear?
And if you should die explaining how
The things that they complain about
Are things they could be changing
Who do you thinks gonna care?”

It’s been a while since I have listened to Kris Kristofferson’s first album, Kristofferson, in its entirety, probably about a decade for that matter.  At the first listen, there were a few good songs, but others seemed like throwaways to my young ears.

This summer, Spotify advertised three months of Spotify premium for 99 cents, allowing me to download, onto my phone, a large variety of music to enjoy on the go.  My plan was to use my phone to play music in my radio-less Mustang by streaming it through a Klipsch Bluetooth speaker.  As many of you probably already know, I use an unreliable and antiquated Windows Phone for most of my communication with the world.  One day a few weeks ago, my phone crashed, deleting the Spotify and all of its associated music.  Slowly, I rebuilt my music library and decided to throw a couple of Kris Kristofferson’s albums into the mix, I’m not sure why.

Apparently, Kristofferson was one of the only albums which had made its way onto my phone.  So, I listened.

His words made me reflect on a quite a few things.  Suddenly, I met my own thoughts with a laugh, or perhaps it was a chortle.  Either way, the laugh was a two part sort of thing; firstly my own interest in the tiny marvels called Bantams and secondly this website you are reading right now.

For the better part of the last 20 years, I have been amazed by these little cars and have waxed on about them, all too frequently to uninterested ears.  However, that never completely stopped me from sharing the joy I have found in this hobby and continuing my pursuit.  Although, at one point, I realized I had soaked everyone I knew in a deluge of Bantam talk and was almost on the brink of silence.  I considered keeping the micro cars to myself and focusing my attention to other things.  After a couple of weeks without Bantams, I realized I got too much joy out of these little cars to keep them locked in some dark recess of my mind.

So, I decided to take to the internet and share my enjoyment of Bantams with the world.  I began blogging about these cars, parts, my projects, and apparently now my own thoughts.  The year this site was introduced, 967 visitors found it.  Eight months into this year, 6,145 visitors have found it.  User engagement is up and people from around the world have reached out to talk about these little cars.  We take turns talking and listening, letting a conversation grow.  Sometimes people end up finding a Bantam in their garage, other times they only take home the warmth of a good conversation.  Quite a few people around this globe have apparently been inspired by this site, and that makes me happy.

With that, I am reminded why I started this website.  I’m not here to change the world, but to share with it something that interests me.  Out of a world of billions, 6,145 people have stopped in for a listen this year, those numbers are pretty good to me.  Hopefully I’ll hook you on Bantams, if I haven’t already, and get you into the club to help carry the torch.  If not, that’s fine too.  I’m glad you’re here, reading, and hopefully enjoying.

Remember why you do what you do, maybe it’ll make your pursuit the easier to undertake and enjoy.

“And you still can hear me singing
To the people who don’t listen
To the things that I am saying
Praying someone’s gonna hear
And I guess I’ll die explaining how
The things that they complain about
Are things they could be changing
Hoping someone’s gonna care”

Sportsman 3: Choosing the Right Foundation

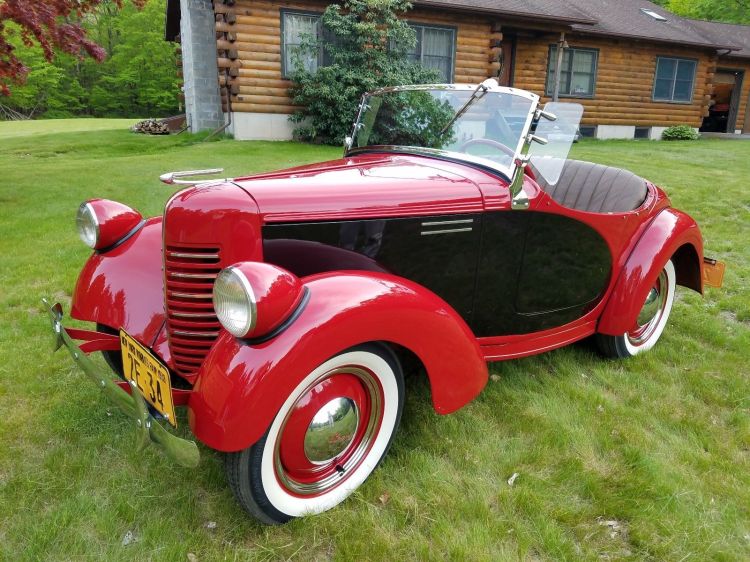
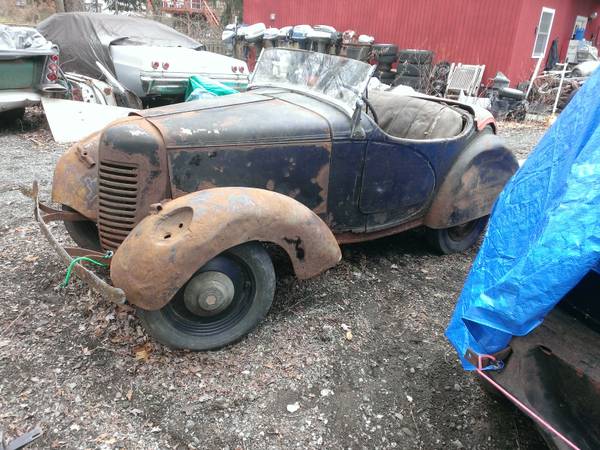
To replace the many pieces of the shop project which were ravaged by the elements and pilfered over time, I had to quickly develop a careful eye toward Bantam parts.  I learned early on that it is very easy to waste money and time on incorrect parts.  The series on the build for the Sportsman is not only an advertisement for our locating and parts services, but also serves as a primer to help you with your project.  If you don’t have a project yet, hopefully this will inspire you to take one on and arm you with information necessary to avoid common pitfalls.

Considering that many of the production changes of the American Austin and Bantam cars were more evolutionary than revolutionary, you may not have expected there to be a large divergence between the underpinnings of each car.  While the chassis of each sort of car should fit under the other, they are all very distinct and each have their own eccentricities of which you need to be mindful.

American Austins, of all shapes and sizes, used one style of frame.  The Austin frame was essentially a v-shaped unit, with no connection at the rear end of the car.  If you’re building an American Austin, your chassis selection is pretty simple.  If you are hoping to underpin your American Austin with a Bantam Chassis for added support and driveline flexibility, you should continue reading.

Austin frame

An American Austin chassis fitted with some Bantam parts.  Note the parallel central crossmembers which are joined by a perpendicular piece with numerous holes along its length.  Also, note the terminal ends of the chassis, they are straight once they get to the center-line of the rear axle.  They are also not connected by anything other than the rear bumper on some models and a thin bracket and bumper on others.

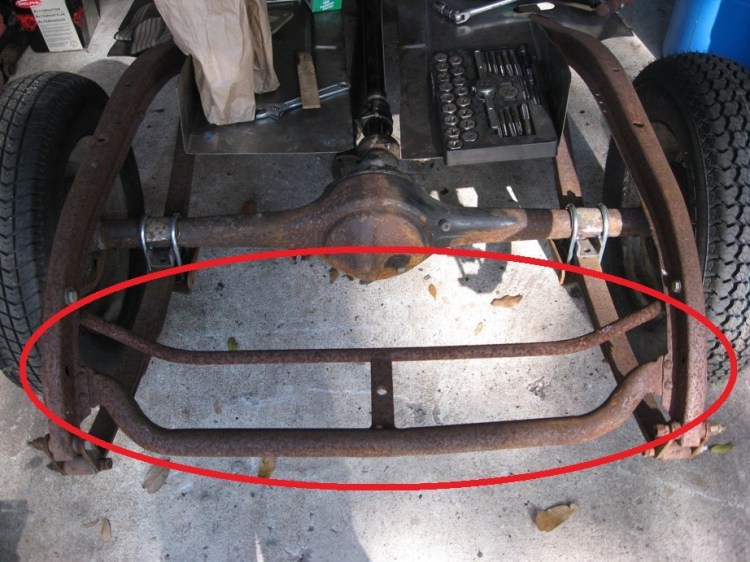
When production resumed as American Bantam, the new cars found themselves equipped with a new frame.  This new frame looked identical to the Austin up until the forward transverse crossmember.  A pair of members now extended from that forward central crossmember to two partial members extending out of the frame just before its upward flare near the rear wheels.  This pair of members formed a V shape and allowed Bantam to switch from a torque tube based drive line to a more modern drive shaft.

1940 Bantam Coupe Frame - center cross members


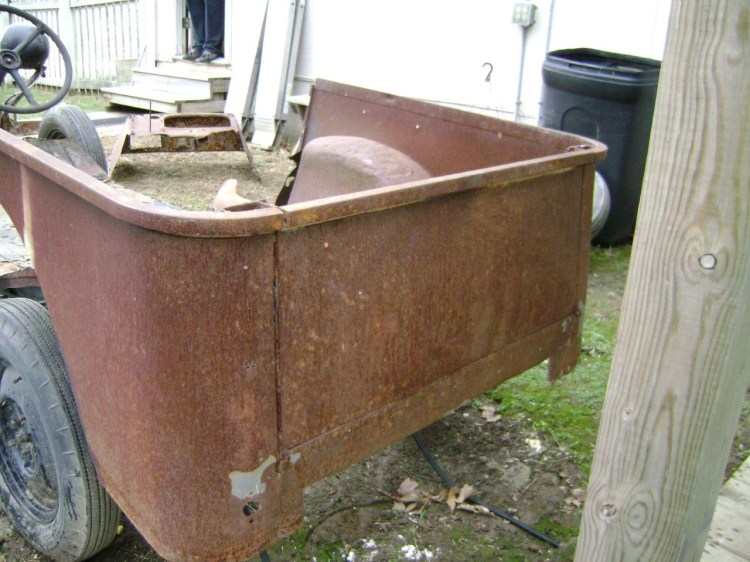
At the rear of the chassis, Bantam used at least three different styles of rear crossmembers which were used for different cars.  Roadsters and coupes had the two rear frame rails unified by a length of thin c-channel in earlier years.  In the final year of production, that thin c channel was replaced with a heavier c channel with a shallower c-shape.  Bantam commercial cars utilized a tubular rear crossmember which also served as a spare tire carrier.  This rear member consisted of two tubes connected by a flat piece of steel.  Bantam four passenger convertibles utilized the larger tubular member from the commercial frames, but forwent the smaller tube, prohibiting the crossmember from serving as a spare tire mount so as to clear the unique floor for accommodating rear passengers.

bantam rear xmember

Here is a photo of a Commercial Style rear cross member.  For a four passenger convertible, the chassis only utilized the larger tubular member and deleted the reset of the components.


For series 65 Bantams equipped with the three main engine, these cars featured a new drive train mounting method which also included a new means of attaching the radius rods.  As such 1940 frames have cast brackets riveted into the corners created by the full transverse crossmember and the frame rails which are absent on all earlier models.  The 1940 also has a ball style socket for the radius rods to couple onto providing for a greater freedom of motion for the rods as compared with the earlier style mount.


1940 vehicles equipped with hydraulic shock absorbers, primarily passenger cars, had a pair of cast brackets riveted to the frame in the rear above where the axle would ride and had a pair of bent steel front mounts riveted where the forged front cross member meets the frame rails.  These should not be mounted on other frames, unless the vehicle was equipped with dealer added shock abosorbers (I’m still hoping to learn more about cars with added shocks).

1940 Bantams also had an extra pair of floor supports located on the V shaped frame members.  These brackets were not available previously.

1940 floor brackets

The next difference between a 1940 frame and earlier style frames is the manner in which the central transverse crossmember is clearanced for the exhaust system.  For a 1940 Bantam with a three main bearing engine, your chassis should look like the photo on the left.  For any other Bantam, your chassis should merely have a hole cut through the crossmember.  This hole will likely be larger than the hole on the driver side of the chassis.


The final difference between the frames revolves around the parking brake assembly attached to the chassis.  The earliest Bantams featured a hand brake on the passenger side of the transmission which protrudes from the floor and is pulled back to engage the brake.  This assembly requires a mounting bracket attached to the transverse crossmember.  It also requires that the transverse brake actuation bar has a pinned member which can be actuated by the pulling of the lever.  This pinned member will be located the passenger side of the bar, between the center line of the frame and the frame rail.  I will have to find some photos of this set up and add them here later.

In 1939, Bantam introduced a new brake assembly which was also floor mounted, but was located under the drivers legs and pulled up.  This assembly featured a bracket which would support the floor riveted to one of the members making up the v shaped crossmember.  This set up also included a cast or forged lever through which the brake actuation bar passes at one end and can be moved by the raising and lowering of the brake handle.  The lever rides free on the actuation bar and pushes against a pinned member when the brake is engaged.

The final variation arrived at some point for 1940 cars.  At this point, the brake bar was endowed with a second pinned lever identical to the standard pinned lever which the brake pedal actuated.  These levers should be fairly close to each other.  This added lever was actuated by an adjustable link attached to a pivoting bar pinned to the chassis.  The pivoting bar was moved by a brake cable which ran into the passenger compartment to a parking brake handle mounted to the underside of the dashboard.  To limit unwanted motion, the cable was fixed at one end to in cabin assembly and to the chassis by a brake cable retention bracket similar to those used elsewhere of the chassis.

1940 brake setup chassis bantam

As you can see, Bantam chassis are not very interchangeable despite a similar appearance.  You can take one chassis and likely modify it to accommodate your required functionality, but please be aware that such a procedure is very time consuming.  There are a lot of bare frames out there waiting for love, you are likely best off taking a bit of time to scour the available parts for just the chassis you need rather than modifying an original chassis.  As you follow along with this project, you’ll see that I have learned this lesson the hard way.

If you are seeking a four passenger or commercial chassis, you may need to consider modifying a standard chassis for the correct model Bantam and acquiring a tubular rear cross member assembly.  As a warning, original tubular rear cross members are difficult to find in decent shape, however we can now supply you with fantastic reproductions.
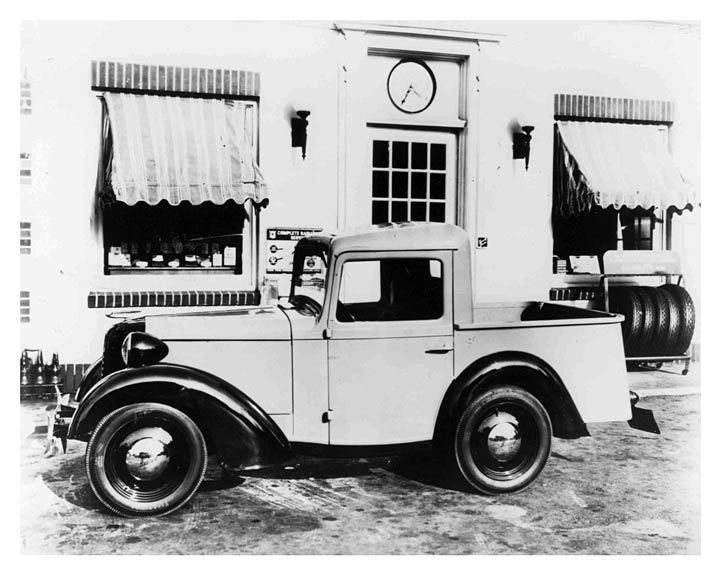